Most of the pages you will edit are general pages. All general pages are broken into header, content top, and content bottom.
Slides 17 through 32 of PowerPoint deck correspond with the instructions below.
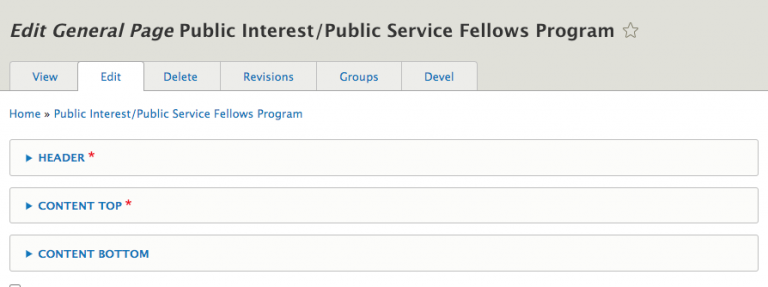
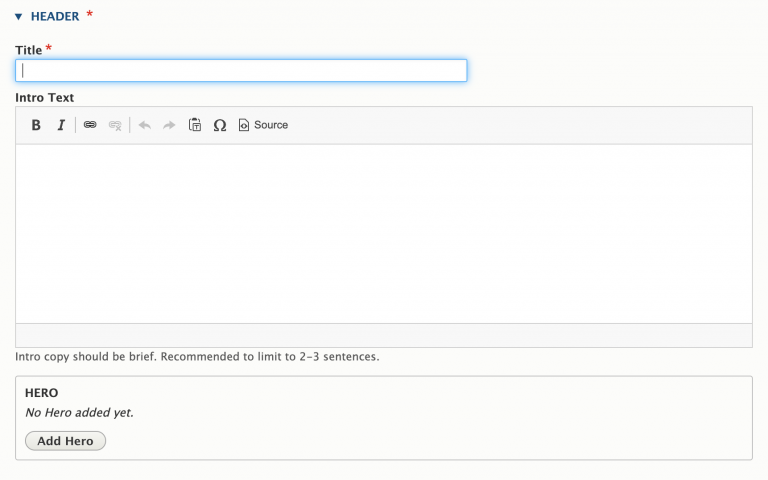
This section contains the page’s title, intro text, and hero image
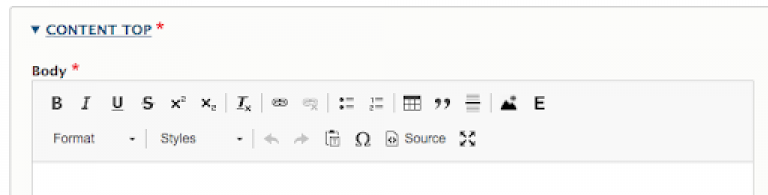
This is the bulk of a page and is structured with elements that appear in the same order across different pages on our site such as the body text, sidebar links, accordions, department callouts, and others. This is where the WYSIWYG for your main content is. (See Slides 17 to 22 in PowerPoint.)
In the WYSIWYG you can style text and add bulleted lists, tables, and headings to break up content and make it clearer and more user-friendly.
First line (below): bold, italics, underline, strikethrough, superscript, subscript, remove formatting, link, remove link, bulleted list, numbered list, table, block quote (example on slide 18), insert horizontal line, embed an image, embed a callout (slide 21)
Second line (below): heading format dropdown, styles dropdown, undo, redo, paste as plain text, insert special character, HTML source code of the WYSIWYG, maximize
There are a few items of note in the WYSIWYG:
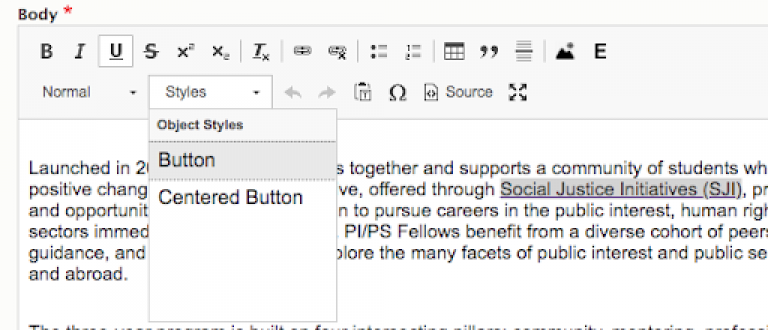
- If you highlight a link and select “style” you can add a button (slide 20).
- The E icon will allow you to add a faculty callout in the text (slides 20 to 22).
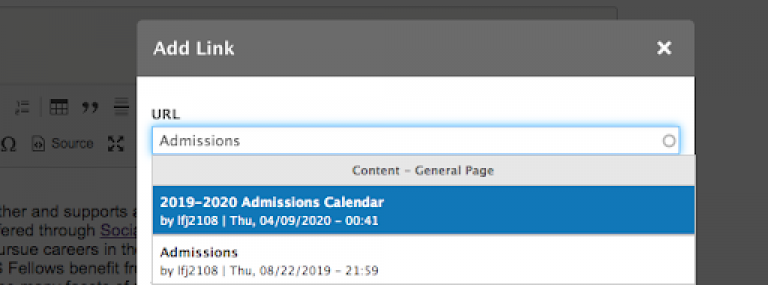
- When you insert a link, you can search for the page that you are linking to (below). It will automatically add it as an independent piece of content, called a node.
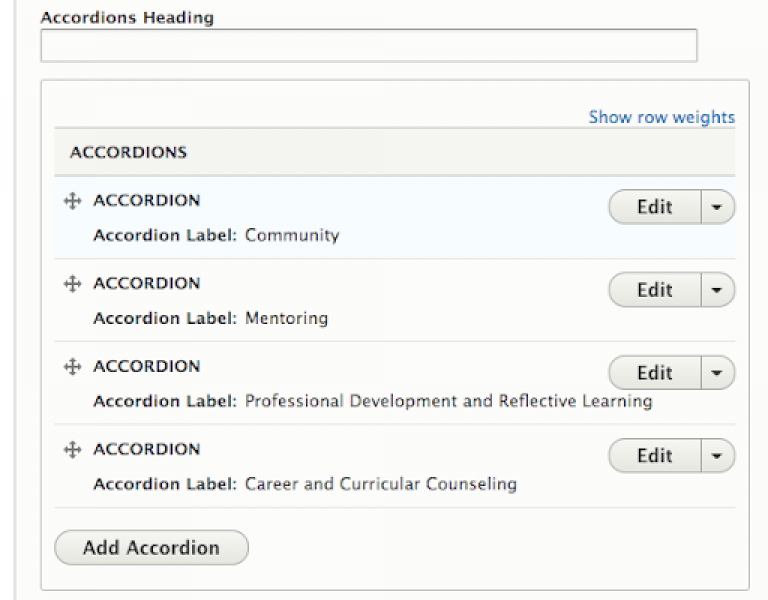
- After the WYSIWYG you will be able to add accordions (expand-and-collapse areas of text) (slide 28).
Key Links
The "key links" feature allows editors to place buttons on the upper right portion of a page that link (1) externally or (2) to other parts of the Law School website. These sections are styled as "related links."
To create a key link, in the section "content top," select the field "add links" under "key links."

This section has optional elements you may mix and match. A few items may require content and nodes that web editors do not have access to, such as statistics or adding a new center or program we don’t already have listed. To request that content please email [email protected].
The elements web editors do have access to are listed in the screen shot below and are described in detail in the training PowerPoint deck.

When you create or edit a page, you will see a sidebar that contains menu settings. This is where you will enter or edit the menu link title of a page and position it in the menu of the site. Every page must have a menu link title and be related to a parent item. (For example, the page titled Roadmaps is nested under the parent item Student Life; the page titled 1L Roadmap, is in turn nested under the parent item Roadmaps.) Every page must be nested in a menu before it is approved and published.
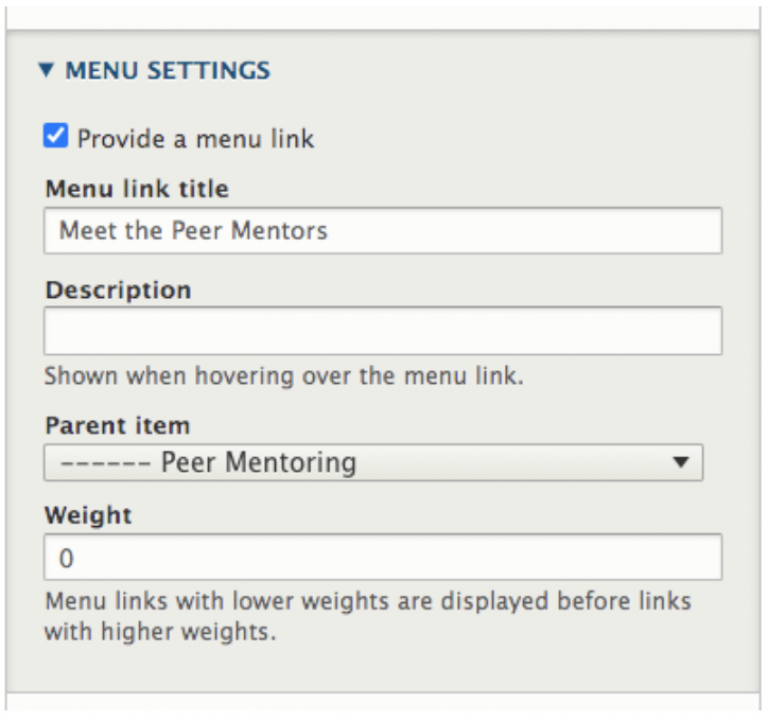
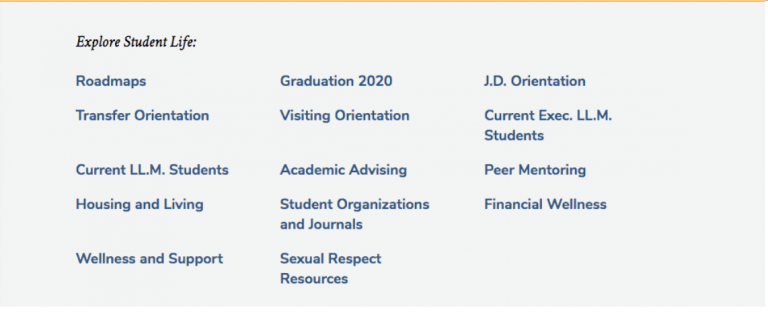
This menu link title is what appears on a section’s parent navigation (as “Roadmaps” and “Graduation 2020” do below). Editing this title in the menu settings will update it in the menu. (If you want to change the parent page’s menu after your page is created, you will return to these menu settings. In the example below, to change Graduation 2020 to Graduation 2021, you need to edit the menu settings.)
When you create or edit a page, you will see a sidebar that contains menu settings. This is where you will enter or edit the menu link title of a page and position it in the menu of the site. Every page must have a menu link title and be related to a parent item. (For example, the page titled Roadmaps is nested under the parent item Student Life; the page titled 1L Roadmap, is in turn nested under the parent item Roadmaps.) No page will be approved without being nested in a menu.
This menu link title is what appears on a section’s parent navigation (below). Editing this title here will change it in the menu. (If you want to change the parent page’s menu after your page is created, you will return to these menu settings. In the example below, to change the Explore Student Life menu for Graduation 2021, you need to edit the menu settings.)
Many components have the option to add an image.
- To add an image, locate the Image dropdown, and click “Select image.”
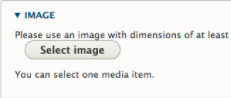
- Note that the Image dropdown will specify what dimensions are required based on which component you are using (not shown here). It is best to crop your photo to that ratio in Photoshop or another program before clicking “Select image,” or the CMS will crop the image for you and may do so in an awkward manner. (If you need assistance, please email [email protected].
- After choosing “Select image,” you will see a window featuring the options “Library” and “Upload Images.”
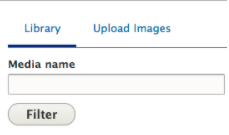
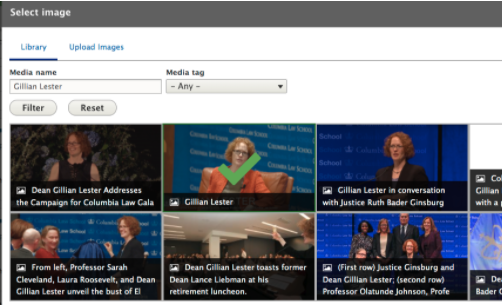
- “Library” is the default option and is where you can find photos that have already been uploaded into the CMS. Please search here first to see if a photo has already been uploaded, to avoid duplicate uploads of the same photo. To search for a photo, type in a brief description of the subject matter under “Media name” and then click “Filter.”
- If you see the photo you want to use, click it. A green checkmark will appear on it. Then select “Place image” at the bottom left of the window.
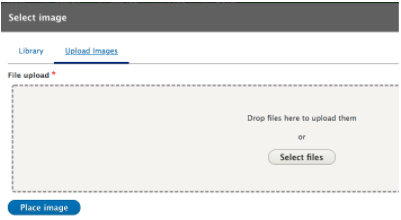
- If you do not see the photo you want to use after searching in the CMS, or if you know that the photo you are uploading is not already in the CMS, click “Upload Images” instead of “Library.” You can either drag and drop your new photo into this window or select it using the “Select files” button. All new files must be under 2 megabytes.
- After the image uploads, you will see a thumbnail of it with small white crosshairs in the center. The CMS will crop the photo by centering the X. If you cropped the image to fit the dimensions of the location where it will be used before uploading, do nothing; otherwise use your cursor to reposition the crosshairs to the center of the part of the image you would like to see when cropped.
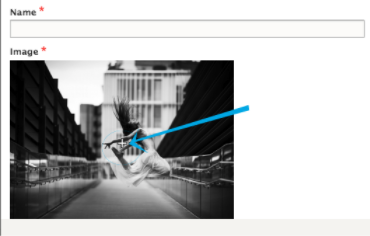
- After the image uploads, you fill in the Name and Alternative text fields for the image.
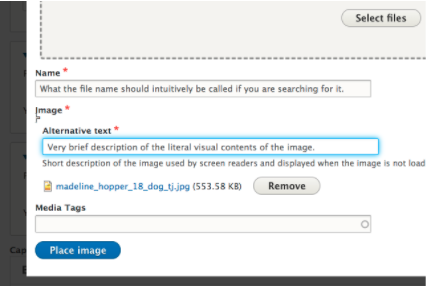
Note that neither of these fields is the caption visible underneath the image. Space for captions is provided elsewhere in the component.
The Name field is what you would call the image to search for it in the CMS. It should be unique but also intuitive for anyone not familiar with it. For example, a picture of alumna Madeline Hopper’s dog TJ featured in “Pets of CLS” might be named “Madeline Hopper’s dog TJ, pets of CLS.” It should not be called “pet” or something non-intuitive like “2020Hopper18TJ.”
The Alternative Text (“alt text”) field is for screen readers, used by people who are not able to view the image on their device. The alternative text is a literal (though not painstaking) description of the contents of an image. For example, TJ the dog might be described as “TJ, a large, furry dog, wearing a blue Columbia Law T-shirt.” For humans, it is not necessary to describe their wardrobe, hairstyle, or physical appearance if it is not relevant to the content. For example, it is not necessary to write, “a portrait of Professor So-and-so, who has grey hair and eyeglasses,” but you might write, “a portrait of Professor So-and-so talking with students.”
Do not fill out the Media Tags field.
Next, select “Place image” to finish inserting the image into the component.
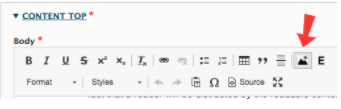
Adding images to body copy using the WYSIWYG field:
You can also add images to body copy of a page or news story using the WYSIWYG field. To insert an image in body copy, click the photo icon—the symbol in the WYSIWYG that looks like mountains.
This will take you to the “Select image” window, featuring the Library and Upload Image options; follow the instructions above.
How to upload a PDF
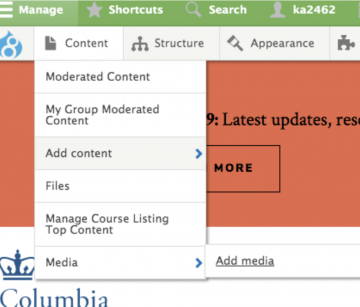
- After logging into the site at law.columbia.edu/cas, go to Content in the upper left corner. Drop down to Media and then click Add Media.

-
Choose Document if you wish to upload a PDF.
-
Choose the file you want to upload from your file structure, enter a name for it (something natural but also unique and unambiguous), and then save.
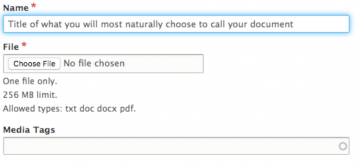
- The file is now uploaded to the CMS.
Create a hyperlink to your newly uploaded file
-
In the WYSIWYG field of the page you are editing, highlight the text to which you wish to add a link, and then click the link symbol (the small chain).
-
In the URL field (below), begin typing the name you entered when uploading the file. You should see that file appear below as a “drop down” under the heading “Media–Document.” Click that file.
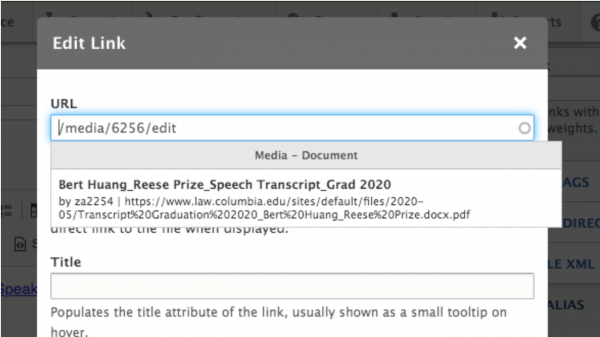
- The file will be linked in the URL field above as “/media/####/edit”
- Save the page.
Slide 8 in the PowerPoint corresponds with the instructions below.
As you edit a page, save it as Draft. (Remember to save early and save often.)

You can view the latest version of a draft and share it with other web editors by selecting the latest version tab.
When you’ve finished creating a new page or editing an existing one and are ready to publish, change the status to Needs Review and save. This puts the page in the Communications queue to publish.
New pages and edits to existing pages will need to be saved as Needs Review in order to be published.

The web team publishes content multiple times every day. Please email [email protected] if you need high-priority or time-sensitive content published.
If there is a page you believe you need access to but don’t see the edit button, please email [email protected] so we can add that to your group.